1. Access the application
Open your browser and navigate to:
2. Dashboard overview
After login, you will see the main dashboard with:- Sidebar: Navigation menu with all sections
- Header: Top bar with global search and user profile
- Main area: Main area with widgets and statistics
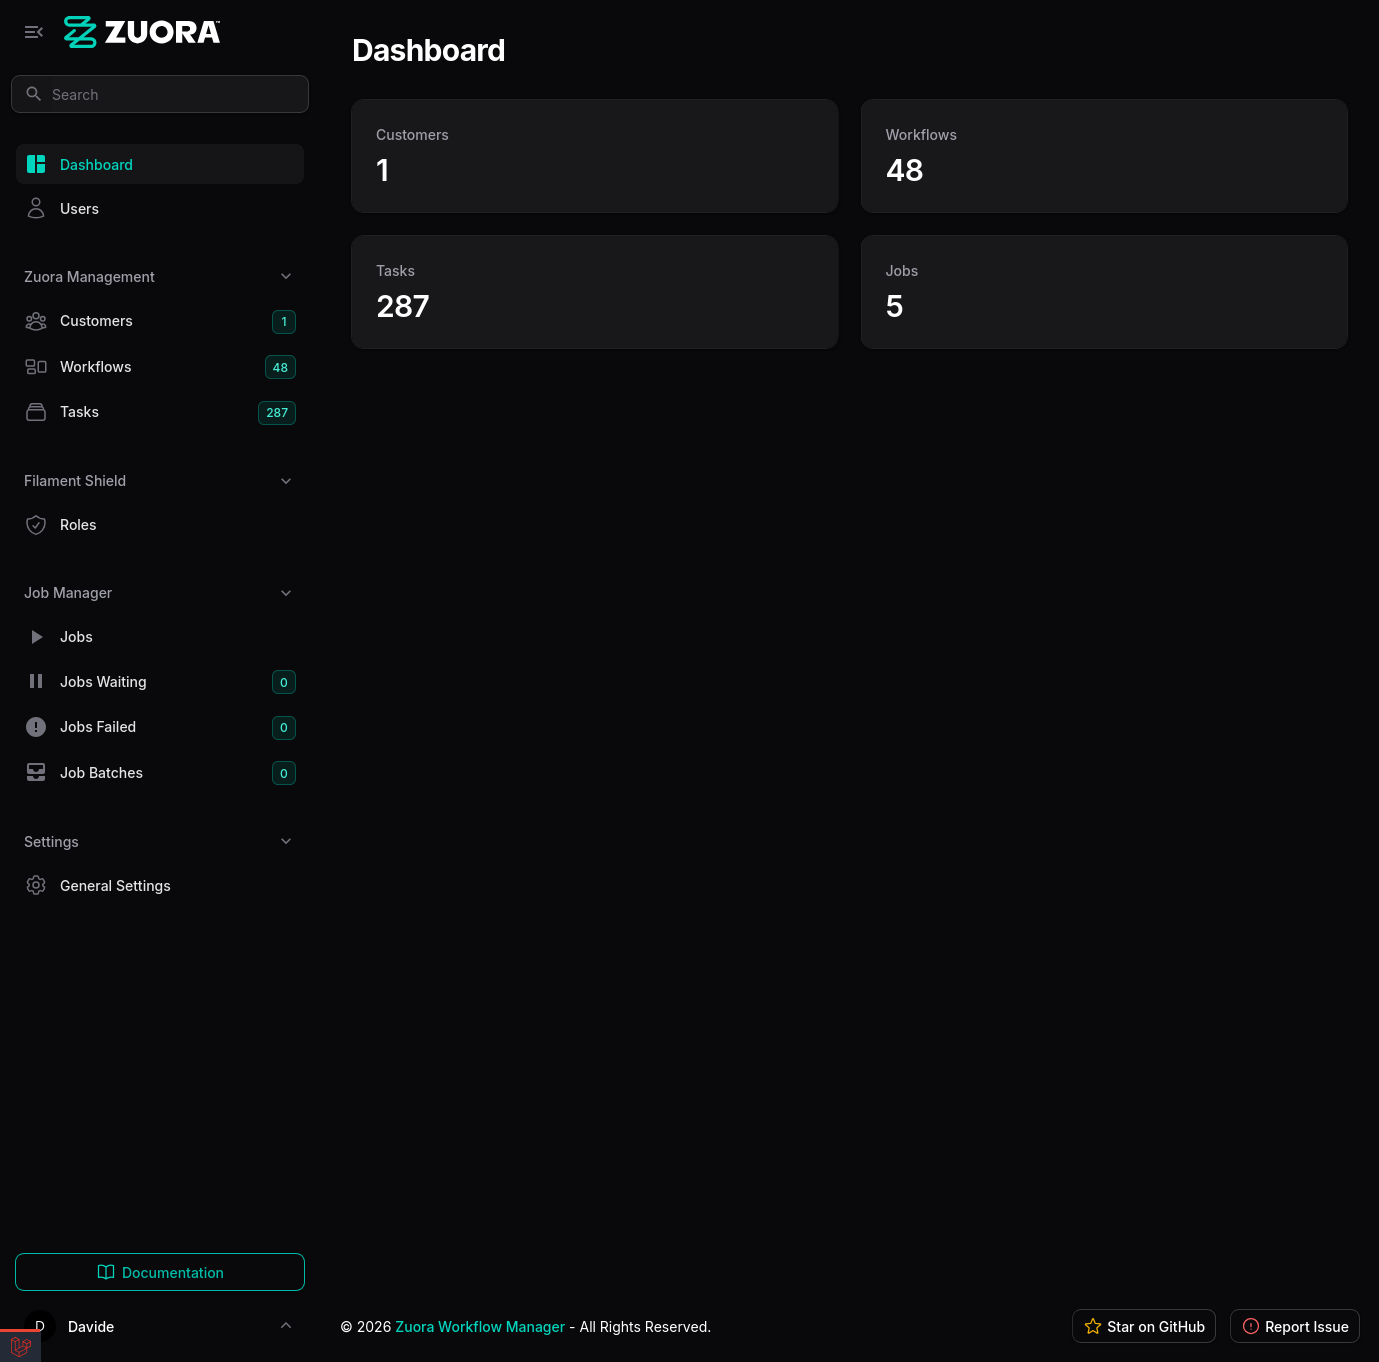
Main sections
- Dashboard: Overview with statistics
- Customers: Customer organization management
- Workflows: Synchronized workflow visualization
- Tasks: Task management extracted from workflows
- Users: User management (admin only)
- Roles: Role and permission management (admin only)
- Settings: Application configuration (super admin only)
- Jobs: Background job monitoring
3. Create first customer
Step 1: Navigate to Customers
Click Customers in the sidebar.Step 2: Create new customer
- Click the New Customer button in the top right
- Fill out the form:
- Name: Organization name (e.g., “Acme Corp”)
- Zuora Client ID: Your OAuth 2.0 Client ID
- Zuora Client Secret: Your OAuth 2.0 Client Secret
- Zuora Base URL: Select the correct endpoint
- Production:
https://rest.zuora.com - Test:
https://rest.test.zuora.com - Sandbox:
https://rest.sandbox.zuora.com
- Production:
Step 3: Save the customer
Click Create to save the customer.4. First workflow synchronization
Step 1: Start synchronization
From the Customers list:- Find the newly created customer
- Click the Sync Workflows icon in the Actions column
- Confirm the operation
Step 2: Monitor the job
- Navigate to Jobs → Jobs Waiting in the sidebar
- You should see the
SyncCustomersJobjob in queue - If the queue worker is active, the job will be processed automatically
Make sure the queue worker is active with
lando queue to process jobs.Step 3: Verify results
- Navigate to Workflows in the sidebar
- You should see workflows synchronized from Zuora
- Each workflow shows:
- Name
- Associated customer
- Status
- Last synchronization date
5. Workflow visualization
Step 1: Open a workflow
From the Workflows list:- Click on a workflow to open the detailed view
- You will see three main tabs:
- Workflow Details: General information
- Tasks: Tasks extracted from the workflow
- Graphical View: Graphical visualization
- Workflow Json: Complete workflow JSON
Step 2: Explore tasks
In the Tasks tab:- View all workflow tasks
- Use filters for:
- Action Type: Email, Export, SOAP, etc.
- Priority: High, Medium, Low
- State: Pending, Running, Completed
- Click on a task to see complete details
Step 3: Graphical visualization
In the Graphical View tab:- View the workflow as an interactive graph
- Nodes represent tasks
- Arrows represent connections between tasks
- Zoom and pan to explore complex workflows
Step 4: Export JSON
In the Workflow Json tab:- View the complete workflow JSON
- Click Copy JSON to copy to clipboard
- Click Download JSON to download the file
6. Task management
Task visualization
- Navigate to Tasks in the sidebar
- View all tasks from all workflows
- Use filters to find specific tasks:
- Workflow: Filter by workflow
- Action Type: Filter by action type
- Priority: Filter by priority
- State: Filter by state
Task details
Click on a task to see:- General information: Name, description, type
- Parameters: Task configuration
- Associated workflow: Link to parent workflow
- Metadata: Creation and update dates
7. Automatic synchronization
Scheduler configuration
To enable automatic synchronization:-
Start the scheduler in a terminal window:
-
The scheduler will automatically execute:
- Workflow synchronization every hour (configurable)
- Failed job cleanup
- Other scheduled tasks
Manual synchronization
You can always synchronize manually:- From UI: Click “Sync Workflows” in the Customers list
- From CLI:
8. Job monitoring
Jobs dashboard
Navigate to Jobs to monitor:- Jobs: Running and completed jobs
- Jobs Waiting: Queued jobs
- Failed Jobs: Failed jobs with retry option
- Job Batches: Batches of related jobs
Retry failed jobs
If a job fails:- Navigate to Jobs → Failed Jobs
- Click on the failed job to see the error
- Click Retry to re-execute the job
CLI monitoring
Monitor jobs from terminal:9. User management (Admin)
User creation
- Navigate to Users
- Click New User
- Fill out the form:
- Name: Full name
- Email: User email
- Password: Password (minimum 8 characters)
- Roles: Select roles to assign
- Click Create
Role assignment
- Click on an existing user
- In the Roles section, select roles:
- super_admin: Full access
- panel_user: Basic access
- Click Save
10. Settings configuration (Super Admin)
Access Settings
- Navigate to Settings → General Settings
- Configure available sections:
Site Information
- Site name and description
OAuth Configuration
- Enable Google OAuth login
- Configure allowed email domains
- Enter Google OAuth credentials
Application Configuration
- Default administrator email
Maintenance
- Enable/disable maintenance mode
- Click Save to save changes
11. Global search
Using search
- Click the search icon in the header (or press
Cmd/Ctrl + K) - Type the search term
- View results from:
- Workflows
- Customers
- Tasks
- Users
- Click on a result to open it
Search filters
Search supports:- Name: Search by name
- Zuora ID: Search by Zuora ID
- Customer: Search by customer
- Status: Search by status
12. Best practices
Synchronization
- Automatic: Use scheduler for regular sync
- Manual: Use manual sync only when necessary
- Monitoring: Regularly check failed jobs
Customer management
- Naming: Use descriptive names for customers
- Credentials: Verify credentials are correct
- Endpoint: Use correct endpoint for environment
Performance
- Queue worker: Always keep queue worker active
- Cache: Use Redis for cache and queues in production
- Database: Monitor database performance
Security
- Passwords: Use strong passwords for users
- Roles: Assign only necessary permissions
- Credentials: Never share Zuora credentials
- APP_KEY: Keep APP_KEY secret
Common troubleshooting
Workflows not synchronized
Verify:- Zuora credentials are correct
- Queue worker is active
- No failed jobs in Failed Jobs
Jobs stuck in queue
Verify:- Queue worker active with
lando queue - No errors in logs with
lando logs -f - Database is accessible
Authentication errors
Verify:- Client ID and Secret are correct
- Base URL is correct for environment
- Credentials have not expired